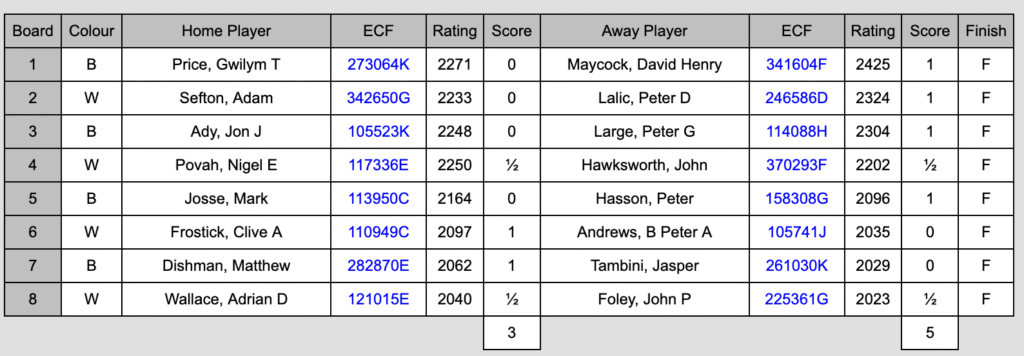
Guildford 1 v Kingston 1, Surrey League division 1 match played at the Guildford Institute on 17 November 2025
In Surrey League chess, as in most professional sport, the home side enjoys an advantage. In our case that is not because of crowd support or pressure on referees, but because it is easier to turn out the strongest possible team when there are no travel issues and when the match is on the night of one’s choosing. So away at Guildford – on paper our strongest rivals for the Division 1 title – was always likely to be a difficult and crucial match. And so it seemed when the teamsheets were exchanged, with Kingston having the rating advantage on boards 1-3, but Guildford having the edge on 4 to 8. For once I won the toss, giving Messrs Maycock and Lalić, at least, their preferred colours.
John Hawksworth was first to finish, with a solid draw against fellow IM Nigel Povah in which both players declined to push for more. But I let the side down in an error-strewn game against Clive Frostick. A brain fade in which I thought I might win two pieces for a rook with a zwischenzug but missed the most obvious reply left me with a compromised pawn structure. Trying to create chances, I sacrificed a pawn and succeeded in inducing Clive to blunder a piece. But he had some initiative for it, and in trying to unravel actively rather than acquiesce in a draw I carelessly allowed a mate which could only be avoided by giving up the queen.
David Maycock soon scored the equaliser on board 1 with White against Gwilym Price. Black had gradually got on top in this game, but David hit back resourcefully.
The remaining games were all heading for endgames and time trouble, with not much certainty about the outcomes (and given that the players mostly stopped recording under the five-minute rule, not much clarity about what actually happened).
On board 5, Peter Hasson won an ending against Mark Josse in which he was a piece up but Mark had two advanced passed pawns which had bypassed Peter’s king as it stormed up the board. Peter managed to combine his rook, knight, king and advanced d-pawn to produce mating threats to advance the pawn, sufficient to win before Mark queened his infantry.
On board 6, Jasper Tambini’s game with Matthew Dishman was level for a long time, but his attempt to attack by pushing kingside pawns left his own king decisively vulnerable in the major piece ending.
The board 3 game between IM Peter Large and Guildford FM Jon Ady was baffling to the occasional viewer. At one stage, Peter seemed to be on the back foot against a sacrificial attack, threatened both down open kingside files and potentially on the back row. But he devised a clever major piece defence along the third rank which addressed all the threats, and the next time I looked he was a rook up and the attack had burned out, so Kingston had taken the lead again.
On board 2, Peter Lalić had Black against the fast-rising junior Adam Sefton, who had recently defeated Peter’s mother when Guildford visited Epsom. So the win was not only crucial in the match but important in terms psychologists understand. Yet again, Peter’s endgame technique depriving the opponent of useful moves was decisive.
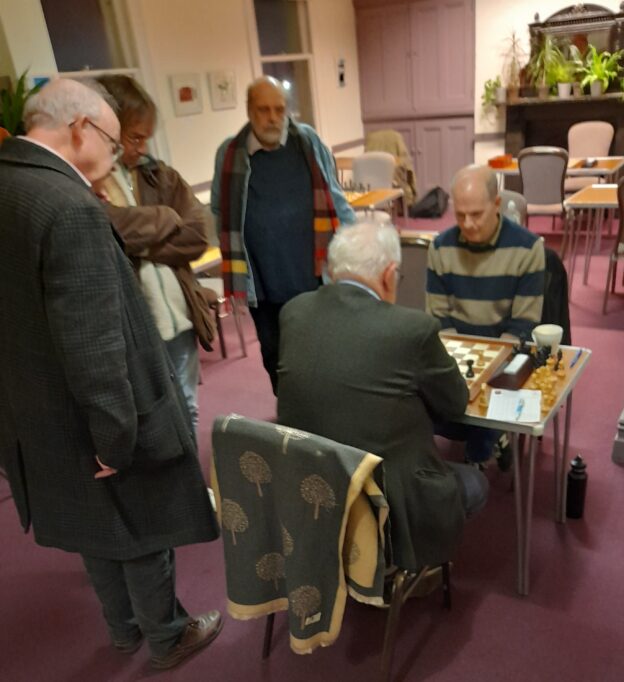
The last game to finish was John Foley’s with Black on board 8 against Adrian Wallace (pictured above). John’s cause looked hopeless when he went into an ending of rook and bishop v rook and knight three pawns down. He had some activity, and regained one of the pawns, but a rook ending two pawns down is still generally lost. However, one of the pawns was a rook’s pawn, which gives the weaker side some hope, as did the clock situation, with John’s opponent often down to a few seconds before moving. As John’s king was forced out from in front of the other pawn, the position below crystallised.
White was in his own words “unable to work it out given the time” and conceded the draw. Some of us were sceptical, but it seems that the position really is a draw.
• If white moves his king up the board to support queening, the black king stops him escaping to the opposite side of the pawn from the black rook, so he can’t use the pawn to block checks.
• If he hangs close to the pawn, eg 1. Ke6 Rh6+ 2. Ke7 Re7+, Black can keep checking.
• If he moves to the right towards the rook, then if the king gets to f7, Rh7+ forces it back to e8 or e6 else the pawn is lost, so he can’t get to the g-file to stop the checks.
• And if he goes to f6 intending Kg7, then after 1. Kf6 Rh6+ 2. Kg7 Rd6 wins the pawn.
• If the white king goes backwards hoping to use his rook to stop the checks, then while he stays on the c-file (or further to the right) Black can keep checking, and as soon as he goes to the b-file Black will be able to move his R to the d-file behind the pawn, winning it, eg at some stage the black rook checks the white king on the fourth rank, 1. Kc3 Rh3+, 2 Kb4 Rd3.
• And once the d-pawn is lost, the ending with the black king in front of the a-pawn is dead drawn, whether or not the rooks stay on the board or are exchanged.
Thankfully that drama was only gilt on the gingerbread with the match win already secured, but it was another illustration of the importance of endgames, and the different sort of visualisation which may be needed there.
Peter Andrews captains Kingston’s first and second teams in the Surrey League